Thursday, November 13, 2008

Pushing Daisies

I'm sure Pushing Daisies is a favorite for many food lovers if only for the fact that it features a main character who bakes pies who has a sweety that makes honey and whose sweety has a couple of crazy cheese-loving aunts. That being said, I just had to share the third episode of this season, which features Ned staring at a truffle (the mushroom type, not the chocolate type) like it's his long lost love.

Go here to launch ABC's full episode player.

-Katy


Bookmark and Share

Wednesday, November 12, 2008

Bierrocks

I really need to get better at taking pictures of what I make at home. If I took pictures of every meal I made, I'd have an endless supply of posts. Maybe if I take a picture of these beautiful bierrocks next time, I can post it at the top of this currently pictureless post and you can go, "Oh my, those look tasty. I must make them now." But for now, you must simply take my word for it that these things are yummy. I make my own dough for these, but by all means, feel free to use frozen dinner roll dough. The operative word here being dough, as in uncooked. I made the mistake of not carefully reading the label of frozen dinner rolls and ended up purchasing the "heat and eat" variety instead of the uncooked stuff. I've also made these with crescent rolls from the tube. If you do that, use two triangles and pinch together the perforated parts. (It just now struck me that perforated bread dough is very strange.)

Bierrocks

Ingredients:
for the dough
2 c flour
1 tsp instant yeast (approx half a packet)
2 T sugar
1/4 t salt
1/2 c milk
2 T butter
1 egg, beaten

for the filling
1/2 lb ground beef
1/4 to 1/2 of a head of green cabbage, shredded
1/2 of an onion, chopped
salt and pepper, to taste
cheddar cheese, to taste, optional

Method:
1) Melt the butter in the microwave, then add sugar, salt, milk, and the egg. Whisk to combine. Heat the milk mixture until warm, not hot. Water over about 120 degrees will kill the yeast.
2) Add the ingredients to a large bowl (preferably the work bowl of a stand mixer with the paddle attachment on it) in this order: 1 c of flour, yeast, milk mixture, 1 c of flour. Stir with the paddle of your mixer or a hefty spoon until it forms a ball. If it will not form a ball, add more flour.
3) If you have a dough hook for your stand mixer, spray it with non-stick spray and run it on your mixer on a slow setting for about 10-15 minutes. If you do not have a mixer, turn the dough out onto a floured surface and knead it. (Stretch it out by pushing it against the surface, fold, turn, repeat.) At the end of either method, you should be able to stretch a small piece of dough until you can see light through it. This means you have developed enough gluten to make the dough strong and elastic, which will give you a nice chewy texture.
4) Put a little bit of oil in a large bowl and toss your ball of dough in it. Leaving the dough in the bowl, cover it loosely with plastic wrap and let it rise in a warm place until doubled in size - about an hour.
5) If you started with ready-made dough, start here. While your dough is rising, brown the ground beef over medium-high heat. Once there is no pink left in the beef, add the shredded cabbage, onion, and salt and pepper. Stir to combine. At this point, you can deglaze the pan if you want. Turn the heat to low, cover, and simmer for at least 30 minutes, stirring occasionally. The cabbage should be completely wilted and the onions soft.
6) Once you reach this point, you can stir in the cheddar and preheat the oven to 375 degrees.
7) Cut the dough into 12 equal pieces, and flatten the pieces into squares that are about 3"x3".
8) Place a tablespoon of filling in the center of each square of dough. Gather up the corners of the square and pinch the dough together to seal.
9) Place the roll, seal side down, in the cup of a standard-sized muffin tin. There is no need to grease it.
10) Once the muffin tin is full of rolls, place the tin in the oven and bake (at 375) for 15-20 minutes. The rolls should be golden brown on top and should spring back when you poke them.


-Katy


Bookmark and Share

Friday, October 17, 2008

Recipe: Bison Chili

This one doesn't get a picture because--let's face it--chili is ugly. It's just a lumpy mass of brown, but man, is it tasty. Chili is one of those dishes that's incredibly versatile. Beans, no beans, tomatoes, no tomatoes, ground meat, cubed meat, beef, lamb, pork, or any combination, chili powder, fresh chiles, any or all of the above. I like to use bison because it's lower in fat and cholesterol than beef, and I also find that the flavor of the meat shines through better than a lean ground beef.

Ingredients
1 lb ground bison
1 (15 oz) can diced tomatoes
3/4 cup black beans
3/4 cup kidney beans
1/2 cup salsa - your choice of heat level
1 chipotle pepper - dried or in adobo sauce
1 Tbsp chili powder
1 pinch cumin
1 pinch cayenne pepper
1 (12 oz) bottle or can of beer - I like lager or wheat beer best - if it's too stout, the beer flavor will overpower the other ingredients
3 cups stock and/or water
1 small can tomato paste

Method
1) Turn crock pot on low heat.
2) Brown bison over medium-high heat. Drain and add to crock pot.
3) Add all ingredients except tomato paste to the crock pot and stir to combine.
4) Cover and cook for at least 4 hours. This is good to start before you leave for work so you have dinner ready when you get home. Well, almost. There's one more step.
5) Stir in the tomato paste before serving.

-Katy


Bookmark and Share

Review of Barbecue


Sure, they completely forget about Kansas City, which is the best barbecue in the whole country, but it's still good.

-Katy


Bookmark and Share

Friday, August 15, 2008

Checking for Doneness

Herein lies the biggest challenge for a new cook, I believe: knowing when something is done. Unfortunately, the most common way to check for doneness of, say, a piece of meat--cutting it open--is also the worst way. Cutting meat while it's still cooking is a good way to get really dry meat. Along with ways to check for doneness of meat, I'll also go through a few ways to ensure that you do not have doughy breads or gooey quickbreads. So, here we go.

The Thermometer Method
Used for: Meat, primarily

Certainly, this is the most accurate way to check for doneness. I would suggest purchasing a digital probe thermometer which has a cord connecting the probe to the readout. This way, you can check on an item in the oven without having to open the oven. You can also set an alarm on the readout which will tell you when it's done.

A couple of rules about this method: First, make sure the end of the probe is as close to the center of the thickest part of the item as possible. Also, make sure it is not touching a bone as this will cause a false reading. Once the item has reached the desired temperature, leave the probe in there for a few minutes (3 minutes for small items up to 15 for things such as a roast or turkey).

You should cook the following items to the following temperatures (all Fahrenheit):
Poultry of any kind - safe to eat at 165°, white meat is most pleasant to eat at 161°, dark meat at 175°
Ground meat of anything but poultry - 155° is safest
Other solid meats - 145° is safest
Doneness levels of things like steak - 125 °=rare, 130 °=med-rare, 135 °=med, etc.
Yeast breads - 190°

The Poke Method
Used for: muffins, cupcakes, quickbreads

When you poke the top of one of these items, it should spring right back. If your finger leaves a dent, let it cook longer.

The Other Poke Method
Used for: meat, esp. steak

Hold your hand relaxed and open, and then press your finger against the fleshy part near your thumb, that's what a rare steak should feel like. Now touch your thumb to your forefinger. This is what a medium-rare steak should feel like. Each successive finger represents the next level of doneness.

The Toothpick Method
Used for: cakes, brownies

Stick a toothpick in the middle of the item. It should come out clean.

The Jiggle Method
Used for: cheesecake, quiches, frittatas

If you shake the pan, the contents should still have some jiggle when you take it out of the oven or off the stove. If you only see jiggle within the center third or less of the item, you're good.

The Bubble Method
Used for: pancakes

When you see bubbles really start to get going on the top of a pancake, flip it. Then, cook the other side to a nice golden brown. (It's okay to peek.)

The Tasting Method
Used for: pasta, veggies

Sometimes, the best way to check for doneness is just to eat some of it. It should go without saying, but don't do this with anything that isn't safe to eat raw.

-Katy


Bookmark and Share

Thursday, August 7, 2008

Ice Cream Basics: The Custard Base

I've been on an ice cream making kick lately. I can't help it. It's summer and it's hot, and my ice cream maker is still relatively new. I find that the best ice cream starts with a custard base. It doesn't freeze up as hard as a base with no eggs in my experience, and I also find it has a smoother, creamier mouthfeel.

Sweet Cream Custard Base

Ingredients:
1 qt half and half
1 c sugar
4 eggs (or 8 egg yolks)
a pinch of salt

Method:
1) Stir together 2 c half and half, sugar, and salt in a saucepan over low to medium-low heat until the sugar is completely dissolved.
2) Whisk together the eggs and slowly whisk in the half and half mixture until you've mixed in about a third, then pour it back into the saucepan. This is called tempering and will prevent the eggs from scrambling when added to the milk.
3) Cook over low to medium-low heat, stirring and scraping the bottom constantly until the custard thickens. It should coat the back of a spoon, and when you run your finger across the spoon, it should leave a track that the custard does not run into.
4) Once you've reached the correct consistency, strain the mixture into the rest of the half and half to stop the cooking.
5) Either chill over an ice bath or in the refrigerator overnight. The colder the mixture is before you freeze it, the better. You will have a better consistency because the ice crystals will be smaller.
6) Freeze according to manufacturer directions on your ice cream maker. I have a Cuisinart ice cream maker with a freezable core (it should be in the freezer at least 24 hours before freezing). I let it go for at least 20 minutes before I check it. I look for the ice cream to be heaping up in a spot before I call it finished. It should be the consistency of soft serve.
7) Put the ice cream in the container of your choice and put it in the freezer. It should be at the right consistency in a few hours.

Variations:
Vanilla -
steep a vanilla bean in the milk and sugar at the beginning of the process, or add a teaspoon or two of vanilla extract just before freezing.
Chocolate - add 1/2 c of cocoa powder to the half and half before adding sugar and salt. Let it get completely incorporated before adding sugar and salt.
Mint Chocolate Chip - steep up to 3 cups of mint leaves in the half and half and strain before adding sugar and salt (I'd suggest using more like 1 cup. I find 3 cups far too minty, but this is the amount I've seen in most recipes), or add a teaspoon of peppermint oil just before freezing. Add the chocolate chips near the end of the freezing process. Keep the chocolate chips cold.
Strawberry - Halve the above recipe. Use 1 c half and half and 1 c cream instead of 2 c half and half. Once the custard is ready, add it and a 10 oz package of frozen strawberries or a pint of fresh, hulled strawberries to a blender and puree.

-Katy

photo via Flickr user laffy4k


Bookmark and Share

Saturday, August 2, 2008

Posh Nosh

Just in case you're starting to take yourself a little too seriously, a good dose of Posh Nosh ought to fix that for you. Posh Nosh is a short-lived BBC show featuring the husband and wife team of Simon and Minty Marchmont. Minty makes ridiculous meals using ridiculous methods (like alienating chorizo or interogating mussels) while Simon looks on, usually critiquing Minty's cooking or describing a bottle of wine in a way that leaves me with no desire to drink it. A choice quote from Minty: "We make our own stock, but by all means buy stock cubes if you have low self esteem."


-Katy

Bookmark and Share

Tuesday, July 29, 2008

How to Read a Recipe

I know what you're thinking. You looked at that title and wondered whether I thought you were an idiot, or perhaps you thought I was an idiot. I assure you. Neither of us are idiots, and some of this may seem stupid; however, if you can approach a recipe in the right way, they will do better by you. (Geez, that was a long sentence.) Basically, what we are trying to do by this method is have a complete idea of what is coming when we make a dish. Think of it like SQ3R, only far less picky.

First, read over the whole recipe, just to get a basic idea of the whole picture.

Next, you'll want to look over the ingredients list and take a careful look at what should happen to each of them. You don't want to get halfway through a dish and realize that deglazing liquid should be at room temperature or that onion needs to be diced fine or that chicken should have been cooked already or worse, those beans should have soaked overnight. Also, make sure you have all the ingredients before you begin.

Now take a look at what tools you will need. It may not say explicitly, but I'm sure you'd be able to glean that you need a pan in order to saute. Make sure all your necessary tools are near at hand to your cooking area.

Take a look at how long each step will take to make sure you have enough time to actually prepare the dish.

Next, start your mise en place. (French for everything in its place or something like that) Chop up your vegetables. Measure your liquids. Get out the right number of eggs. Get out all the herbs and spices you'll need. (If you're particularly anal, you can measure them out and put them in custard cups just like on TV.) Make sure all your ingredients are prepped and within reaching distance. I just let everything sit on my cutting board.

Now that everything is in place, take one last look at the recipe. There may be a teaspoon of salt hidden in the directions. (My Better Homes and Gardens cookbook does that to me all the time.) Or that cup of buttermilk may need to be split in half. Or the oven may need to be preheated. (I ruined many a pan of brownies with this one.)

Finally, you're ready to start cooking. It may seem like this takes a long time, but there are three reasons why it doesn't. 1) It will save you time because you won't have to stop in the middle of a recipe to cut something up or run to the store. 2) It will save you time by streamlining your procedure. 3) You only have to go through this process once per recipe.
-Katy

Bookmark and Share

Recipe: Fried Rice

Most people think of fried rice as a side dish, but I am here to present an argument for its inclusion as a main dish. If you add meat to it, you have all the elements of a meal all rolled into one: protein, grains, and vegetables. And even if you don't have the meat, you still have eggs for your protein. And if you're a vegetarian, you can always use tofu. See? It's not just a main dish. It's a whole meal!

Fried rice is a pretty versatile dish, so it's perfect for using up leftovers. In fact, it actually works better with leftover rice than with fresh rice (though I rarely make it with leftover rice because the only other ways we eat rice is in etouffee or red beans and rice). I usually use onions, carrots, and peas for the veggies, but just about any combination would work, and I would encourage you to experiment. Now, onto the recipe.

Ingredients:
canola oil
2 cloves garlic
1 small to medium onion, diced
1 medium to large carrot, quartered and sliced (1/8" thick)
3 cups cooked long grain white rice
sesame oil
2 eggs
1 t ginger
frozen peas
soy sauce

Method:
1) Saute garlic, onion, and carrot over medium to medium-high heat in a little bit of canola oil (just enough to coat the pan) until nearly tender, about 6-8 minutes.
2) Add rice and stir to incorporate. You're not trying to put color on the rice, just heating it up and getting it mixed in with the vegetables.
3) Make a well in the rice. Pour sesame oil and then eggs into the well. Stir the eggs until they are partly scrambled, and then incorporate them into the rice.
4) Add ginger and frozen peas and stir until the peas are heated through.
5) Add soy sauce to taste.

-Katy

Bookmark and Share

Monday, July 28, 2008

Recipe: Double Berry Pie

"You Can Convince Yourself It's Healthy" Double Berry Pie

Crust:
1/2 c whole wheat flour
3/4 c all-purpose flour
1/2 tsp salt
1/3 c butter
1/4 c ice water

Filling:
2 1/2 c strawberries
2 1/2 c blueberries
1/2 c sugar
3 Tbsp cornstarch

Topping:
3/4 c rolled oats
1/2 c brown sugar
1/2 tsp cinnamon
dash salt
2 Tbsp butter

1. For crust, cube butter and combine with flours and salt in a food processor until mixture resembles coarse crumbs. Add water a little bit at a time until dough comes together. It may not necessary form a dough ball in the food processor, but it should hold together if you squeeze it.
2. Chill dough in a plastic zip top bag for at least 30 minutes. Roll out dough in the plastic bag. Cut off 3 sides and invert over a pie pan and press into place. Prick crust with a fork and cover with a double layer of foil. Blind bake crust for 10 minutes at 400 degrees.
3. For filling, mix together all ingredients. I would suggest sifting the cornstarch into the sugar and berries to help prevent cornstarch clumps in your pie.
4. For topping, mix together oats, brown sugar, cinnamon, and salt. You can also add a pinch of nutmeg if you'd like. Cube the butter and cut into the other ingredients until mixture (excluding the oats) resembles coarse crumbs. I start by using my fingers and then cut in the rest of the butter in with a fork.
5. Once the crust comes out of the oven, turn it down to 375 degrees. Remove foil, add filling, and top with oatmeal topping. Bake at 375 for 1 hour and 15 minutes. Let cool at least 1 hour before eating.
Bookmark and Share

Recipe: Granola Bars

Granola Bars

3 c rolled oats
2 c nuts (I used almonds and pecans and crushed them with a mallet)
3/4 c shredded coconut
6 T brown sugar
6 T maple syrup
1/4 c vegetable oil
3/4 t salt
1 c raisins

Mix together oats, nuts, coconut and brown sugar in a large bowl. Set aside.

In another bowl, mix together maple syrup, oil, and salt. Mix into dry ingredients.

Spread mixture onto two sheet pans and bake in a 250 deg. oven for 1 hour and 15 minutes, stirring every 15 minutes.

Remove to a large bowl. Add raisins and mix until evenly distributed.

To make bars:
1/4 c vegetable oil
1/4 c brown sugar
1/4 c honey
1/3 c peanut butter
3 1/2 c granola
6 oz. chocolate chips

Mix together first four ingredients. Microwave for two minutes, stirring halfway and at the end. (If I were making this again, I'd probably leave out the oil.)

Mix into the granola. I mixed the chocolate chips in at this point, so they melted. Wait for it to cool some if you don't want this result.

Press into the bottom of an 8"x8" square pan. I used the back of a spoon. You can use your hands, but you'll want to grease them up first.
Bookmark and Share

Recipe: Chicken Stock

Stock is a strange dichotomy for me. It's really quite simple to make, but it makes me feel like an accomplished cook when I see water turn into a rich, golden liquid because of something I did. It might also have something to do with the fact that when I make stock, it means I have cooked with a whole chicken, which means I have cut it into pretty little pieces of drumsticks, thighs, and boneless-skinless chicken breasts. This is a somewhat complex process, so I won't get into it now. But if you'd like to make your own stock without starting with a whole chicken, I would suggest using chicken wings or chicken feet. Most supermarkets will not have these on display, but you should be able to get them if you ask the butcher. In fact, they will probably be glad to get rid of them. If you roast a whole chicken, you can also use the leftover bones for the stock. The bones from a roasted chicken will yield a slightly different result. The stock will be darker and a bit more flavorful than a stock that starts with raw bones. They both have their place in the kitchen.

Chemistry 101
When you make stock, you are infusing the water with the flavor of chicken and your choice of vegetables, yes, but mostly you are working magic with the bones. See, bones are full of collagen, and when you cook collagen slowly with a wet cooking method, the collagen dissolves and becomes gelatin. Gelatin, the thing that makes Jell-O possible, gives stock a rich, meaty mouthfeel. It's also why soup turns into goo when you put it in the refrigerator.

Basic Chicken Stock

Ingredients:
1 chicken carcass, broken down into small pieces or 1 lb of chicken wings and/or feet (cut wings at joints, cut claws off feet)
2 carrots, cut into large chunks
2 celery stalks, cut into large chunks
1/2 onion, layers separated
Optional: herbs (1 bay leaf, a sprig of thyme, a couple sprigs of parsley, and a couple peppercorns would be what I suggest. I usually leave them out. I prefer to not risk the clash of seasonings when I put stock in a dish. Some people also put salt in their stock, but I do not. That's mostly a personal preference, but if this stock is ever going to be reduces, salting it would be a bad idea.)
Water

Method:
1) Toss all ingredients into a large pot and pour in enough cold water to cover everything.
2) Put the pot on a burner set to medium-high, and let it come to a boil.
3) Once it has come to a boil, turn the heat down to medium-low. You want it to just be at a simmer - bubbles slowly coming to the surface.
4) Let it simmer for at least 2 hours. 4-8 hours is ideal. Check on it every once in a while to make sure it hasn't come to a boil and to remove any scum that has risen to the surface with a slotted spoon or a wire strainer.
5) When the stock is done, fill a large bowl or your sink with ice and water and place a container big enough to hold the stock in the middle. This step is not completely necessary for a batch this size, but it is reassuring from a food safety standpoint. Also, if you make a batch much larger than this, putting hot stock into your refrigerator will raise the temperature of the fridge into the "danger zone". Letting the stock cool on the stove top is also a bad idea, therefore, ice bath.
6) Place a fine strainer on top of your container, and ladle stock over the strainer into the container until the water level in the pot is low enough that you feel confident pouring the stock from the pot. You can also siphon it, but be careful not to burn yourself.
7) Stir the stock to help it cool quickly, then cover and store in the refrigerator.
8) The next day, there should be a layer of fat on the top. You should be able to just pull it off. Now your stock is done. Use it within the next few days, or freeze it for up to 3 months.
Bookmark and Share

Recipe: Strawberry Sorbet

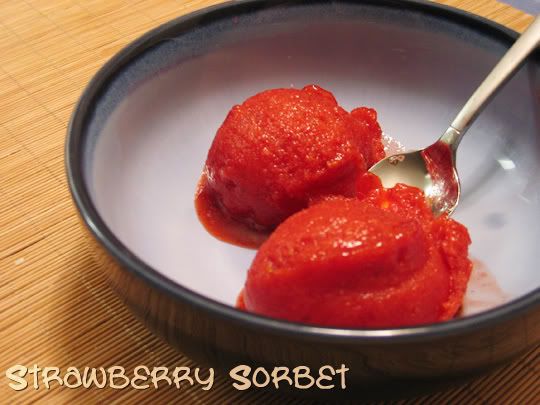
See over there? That's my first foray into the world of food photography. Not bad for a first attempt if I do say so myself. (Though I have to admit to a little post-camera tweaking.) That lovely looking strawberry sorbet you see above is what I made tonight. It's so so yummy. And it's really not that hard . . . assuming you have an ice cream maker. It would be rather difficult if you didn't. I have this one, and I very much enjoy it. To get it ready for the sorbet, the core has to go into the freezer the day before.

In the interest of full disclosure, I have to tell you that I used some leftover strawberries that were in my freezer as well as some in my fridge. So the amount on the strawberries is purely an estimate. However, I think it's pretty close thanks to the gauge on the side of my blender.

You'll notice the presence of alcohol in the sorbet. Don't worry. You can't taste it. It's just there to lower the melting point of the sorbet and therefore help keep it from freezing into a strawberry-flavored block of ice. If you wanted to be able to taste the alcohol you add, I would recommend orange liqueur or brandy. If you use those, I would up the alcohol content a tad and lower the sugar content to keep it from becoming too sweet and preserve the texture. Other ways to tweak? Lemon juice and/or zest or balsamic vinegar.


Strawberry Sorbet

Ingredients:
1.5 pints strawberries
2/3 c sugar
2 Tbsp vodka

Method:
1) Cut the leaves off the tops of the strawberries and slice in half.
2) Put all ingredients in a blender and puree until smooth. If you wish to, you can strain it. (I didn't.)
3) Start up your ice cream maker and pour the base from the blender into the ice cream maker.
4) Freeze according to the manufacturer's directions. I let mine run for 15 minutes.
5) Put into a container and leave in the freezer for at least 3 hours before serving. Or eat it straight out of the ice cream maker if you just can't wait.
Bookmark and Share

Kitchen Essentials: The Pantry

I can't lie. This has been a difficult one for me. It's hard to come up with a pantry that will work for everyone. Personal taste and dietary restrictions certainly play into what goes into a pantry quite a bit, but this should be a pretty good multipurpose pantry, especially if you're stocking it for the first time. This pantry will include perishable items, but only those that should be in your fridge most, if not all, of the time.


Shelf-Stable General Pantry Items
Beans, dried and/or canned – I suggest kidney, pinto, chickpeas, split peas, and black beans
Oils Рcanola oil for frying, saut̩ing & baking, extra virgin olive oil for saut̩ing & salad dressing
Garlic
Onion
Potatoes
Sweet Potatoes
Pasta – spaghetti, linguine, lasagna, macaroni
Pasta sauce
Tomatoes – fresh or canned (diced & crushed is what I suggest); keep only canned tomatoes during fall and spring, fresh tomatoes at that time are pretty bad
Broth or stock
Rice – long grain white, long grain brown, Arborio
Oats – rolled, steel-cut, instant
Tomato paste
Couscous - I choose whole wheat
Vinegar – white, balsamic, cider
Sesame oil - great for Asian dishes
Nuts
Artichoke hearts
Sun-dried tomatoes
Roasted peppers - this and the previous two go great in pasta
Canned veggies - I'll admit it. I keep them around for a quick side dish. I even cook them in the microwave. (What kind of foodie am I?)
Tea - I'll restore my cred here by telling you that I brew loose leaf tea. Make chai this way. You will never go back.
Coffee
Tortilla chips
Canned fish - tuna, salmon, anchovies if you eat Italian a lot

Baking Staples
Flour – all-purpose, whole wheat
Baking powder
Baking soda
Sugar
Powdered Sugar
Brown Sugar
Honey
Cocoa powder
Chocolate chips
Baking chocolate
Yeast
Maple syrup
Vanilla extract
Cornmeal
Raisins
Cornstarch

Dried Herbs & Spices
Chili powder - It's a good multipurpose spice mix for chili (of course), barbecue, etc.
Cinnamon
Ginger
Allspice
Cloves
Nutmeg - I like buying them whole. They're the easiest to grind. You can just use a grater.
Paprika - Once again, good for a lot of things. My favorite use for it is fried chicken.
Cayenne - Good for cajun cookery and chili
Cumin - Good for mexican food and chili
Oregano
Peppercorns - I keep them whole becuase they are so much more versatile than ground.
Salt
Rosemary
Thyme
Poppy seeds
Sesame seeds
Red pepper flakes
Mustard powder

Refrigerator Items
Carrots
Celery - mixed with carrots and onions, you get the basis of just about all French cooking
Milk
Eggs
Bell peppers - mixed with celery and onions, you get the basis of just about all Cajun cooking
Peanut butter or other nut butter
Bread
Pickles
Ketchup
Mustard
Mayonnaise
Soy sauce
Worcestershire
Salad dressing
Butter
Cheese – mozzarella, parmesan, cheddar
Cream cheese
Orange juice
Tortillas
Basil
Parsley
Salad greens
Apples and/or pears
Prepared horseradish
Olives
Salsa
Cottage cheese
Green onions
Lemons

Freezer Items
Frozen fruit – berries, cherries, and peaches
Frozen veggies – spinach, peas, fries
Chicken breasts
Sausage
Bookmark and Share

Recipe: Red Beans and Rice


Let's start this out with a little lesson in Creole cooking, of which red beans and rice is a part. Apparently, it is not Cajun. Personally, I find Cajun and Creole nearly indistinguishable since they share very similar flavor profiles. Does that make me a bad
southerner? Perhaps. I can, however, tell you a bit about the history of the two cuisines. Cajuns - or Acadians - came from Canada. They have French roots, and therefore Cajun cooking is French cooking
adapted to locally available ingredients. Hence you have the ubiquitous presence of roux (a thickening agent based on flour and butter or oil), stock, and their adaptation of mirepoix called the
holy trinity. Mirepoix consists of two parts onion, one part celery, and one part carrot. The holy trinity simply replaces the carrot with bell pepper.

Creole cooking originated in New Orleans. It also uses French techniques, but blends other European, African, and American influences. It also has different origins in that Cajun cooking
originated from peasant food while Creole cooking originated with aristocrats.

Along with roux, chicken stock, shellfish stock, onion, celery, and bell pepper, there are several ingredients you will commonly find in Cajun and/or Creole cooking. These include garlic, green onions, cayenne pepper, bay leaf, shellfish (esp. crawfish (crawfish etoufee
is friggin yummy)), smoked sausage (esp. andouille), and white rice. You can pretty successfully fake a Cajun/Creole dish by including the holy trinity and some of the other ingredients.

Now let me say that I am not an expert on these cuisines. I've learned what I have by looking for recipes to satisfy the tastes of my Southern boy of a husband and talking to my history buff and Louisiana-living father in law.

Now that the background is over, let's get to the cooking.

Traditionally, the beans, rice, and sausage are cooked separately and combined at the dinner table, but I don't do that. I mean, why dirty up three pots when you can dirty up just one? So I throw it all in the Crock Pot. This is also often made with a pork bone or ham hock, but I don't do that either. I find the andouille sausage imparts plenty of meaty flavor to the beans. If you are a vegetarian, I would suggest adding some liquid smoke or smoked meat substitute as the
smoky flavor of the sausage is very important to the dish. This makes a ton, and it's even better as leftovers, so freeze it for later.

Ingredients:
1 c diced onion
1/2 c diced celery
1/2 c diced bell pepper (color doesn't really matter, I use green
because it's cheap)
1 clove garlic, minced
1 bay leaf
2 c kidney beans
2 links of andouille sausage, quartered and cut in 1/2 inch slices (I
want to say that's 4 oz)
1 q chicken stock
2-4 c water
salt and pepper, to taste
pinch of cayenne pepper
1 c uncooked long grain white rice

Method:
1. Rinse the beans and pick out any non-bean matter. I find that
there is no need to soak them since they will be cooking for so long.
2. Toss everything but the rice into a slow cooker. Stir, cover, and
cook on low all day.
3. About 30 minutes before serving, stir in the rice.
4. Remove the bay leaf before serving. Offer hot sauce at the table.

Wasn't that easy?
Bookmark and Share

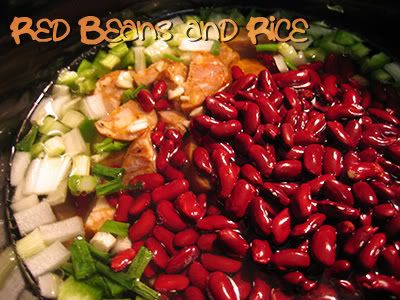
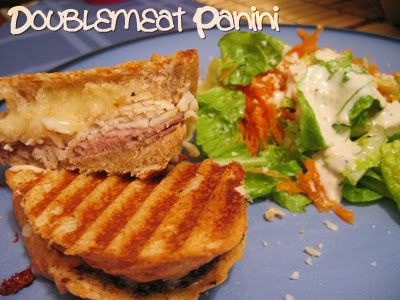
I'd say the inspiration is pretty obvious, wouldn't you? I felt so clever when I came up with it. I used a panini press, but you don't really need one. Just make sure you press down well with a spatula and cook it like a grilled cheese. Or you can just go crazy and use two pans like Alton Brown does. Crazy dude. *hearts* I ate the panini with a salad and called it dinner, but they also make for tasty finger food - depending on the bread, of course. Skinny baguette=finger food. Big fat round loaf=meal.


Ingredients:
French bread, sliced diagonally
Olive oil
Provolone cheese, either sliced or shredded
Roast beef
Chicken breast
Sundried tomatoes
Caesar salad dressing

Directions:
Chop up the tomatoes very finely and mix with the caesar dressing.
Brush the bread on one side with olive oil.
Assemble the sandwiches thusly, from bottom to top: bread (oil side down), tomato/dressing concoction, beef, chicken, provolone, bread (oil side up).
Place on a pre-heated panini press or skillet over medium to medium-high heat and cook until bread is toasted and cheese is melted. 3-5 minutes on the panini press.
Bookmark and Share

Recipe: Spaghetti and Italian Sausage

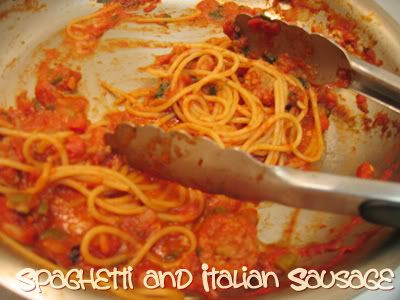
This post is really just an excuse to teach you how to make tomato sauce. Though Italian sausage is certainly a yummy way to augment your tomato sauce. I confess that I do not often make my tomato sauce. I don't know why. You can make it in giant batches for way cheaper, especially if you use herbs from your garden. Unfortunately, a batch large enough to use an entire package of fresh herbs would be ridiculous. Alternatively, you could also use dried herbs, but it won't taste as good. Seriously, plant an herb garden. Basil, oregano, and thyme are great and quite versatile. I could eat basil straight off the plant. Seriously.

Okay, so I don't actually have an herb garden right now. We're moving from an apartment to a house in less than a month, and it would be a serious pain to move it. I want one so bad. :( I got the herbs from my very first CSA box. The basil was so beautiful I could cry.

So, how do you make tomato sauce?

You can make a basic tomato sauce with just olive oil, garlic, onion, and tomatoes. You saute the garlic and onion in the olive oil. (Most recipes require you to sweat the garlic and onions, meaning you cook them slowly until they turn transparent without letting them brown. I like sauting better. Letting the onion get a little bit of color makes it more flavorful.) Then, you add the tomatoes and simmer. You can augment it by adding bell pepper (with the garlic and onions), oregano, thyme, basil, and/or parsley (at the end), and/or crushed red pepper (whenever, pretty much). I put all of these in my tomato sauce, and I am glad to say that my husband said it was his favorite. I use a mixture of diced and crushed tomatoes because I like the consistency of the sauce at the end, but you can use any that you want. Or even fresh ones.


Tomato Sauce

Ingredients:
2 T olive oil
2 cloves garlic, minced
1/2 medium onion, diced
1/2 green bell pepper, diced
1 15 oz can diced tomatoes
1 28 oz can crushed tomatoes
enough fresh basil, thyme, oregano, and parsley for a handful (about 1/4-1/3 c)
1 t red pepper flakes

Method:
1. Saute the garlic, onion, and bell pepper in the olive oil over medium-low to medium heat until the onions are transparent.
2. Add the tomatoes and simmer over medium-low heat for 20-30 minutes.
3. Just before serving or storing, add the herbs and red pepper flakes. You just want the herbs to wilt before serving, no more, especially if you're storing it to serve later. I freeze tomato sauce in a muffin tin and then transfer the sauce to a ziptop bag.

To make the spaghetti and italian sausage, cut up one link of sweet italian sausage into bite sized pieces (or use bulk sausage). Brown the sausage over medium-high heat (use a little oil or non-stick spray) until cooked. It shouldn't take long, maybe three minutes. Add 1 1/2 c of sauce, and heat through. Meanwhile, boil 1/2 lb of spaghetti in salted water. When the pasta is done, drain and toss with the sauce.
Bookmark and Share

Kitchen Essentials: Equipment

Getting started in a kitchen is hard. If you don't have a lot of experience cooking, how do you know what you need to buy now, what can wait for later, and what will go unused? I already had a fair amount of cooking experience when I got married and moved out of my parents' house, but I still messed up. There were quite a few things that I wished I had put on our wedding registry and a few that I look at now and go, "Why did I want that?" For example? An iced tea maker. I had an idea that since my husband--good southern boy that he is--liked sweet tea, I could make it at home with an iced tea maker. I used it once. It's still taking up space in my small appliance area in the pantry. I honestly don't know why I haven't gotten rid of it.

Now let me preface this list by saying that I normally cook for myself and my husband only. The following list of equipment has served me well in this capacity. I feel that it would still translate well to larger families, but I can't know for sure. I've divided the list into three parts. I would recommend buying everything in the first list before attempting to cook in your kitchen. (You should be able to do this with good quality equipment for less than $300. Yes, you can buy the cheap stuff and save some money, but you'll just end up buying it over and over. Get some good quality, durable equipment, please.) The other two lists I have put approximately in the order in which you should buy them.

The Bare Bones Kitchen
7"-9" chef's knife, paring knife, serrated bread knife - We've been over this one.
2 cutting boards - You need two for food safety reasons-one for meat, one for veggies. You can use a wooden cutting board for veggies, but I would recommend plastic or silicone for meat. Don't use glass or marble cutting boards period. They will dull your knives.
10" saute pan - Non-stick or not, it's really your choice. I have both, but I only end up using the non-stick pan for eggs. Most foods will let go of the pan if you let them sit long enough and start them on a pan that's already heated. If you go with a pan without a non-stick coating, don't buy one that is copper or aluminum. Both metals will leach into acidic foods and make it taste weird. However, if you're into candy making, copper is great. You'll use this to sear meat, saute vegetables, pan fry, and make some sauces.
stock pot and/or dutch oven - I like cast iron dutch ovens over enameled ones. I'm paranoid that the enamel will chip, and besides, cast iron pans enrich your food with iron. When I was little, I was
anemic at one point. The doctor told my mother to cook my food on cast iron. Crazy, isn't it? You'll use this to make soups, cook pasta, deep fry, and braise.
8" square baking pan - I like pyrex best. It's easier to tell when food is done and harder to burn it. You'll use this for cakes and casseroles. It also works as a roasting pan in a pinch if you don't
need to cover what you're cooking. For that, you can use the dutch oven.
Utensils - Silicone spatula, can opener, mixing bowls, and measuring cups and spoons (Oxo good grip ones are great. For liquids I have an adjustable one that's basically a tube on a gasket.)

Not Quite so Bare Bones
baking equipment - 2 half sheet pans or cookie sheets, pie pan, muffin tin, loaf pan, whisk and/or hand mixer, rolling pin
vegetable peeler - Buy one with a comfy handle, not one of those cheap metal things. You know what I'm talking about.
tongs - I use these all the time - to stir pasta, to flip solid food, to toss salads, etc.
wire mesh strainer- Use it to drain pasta, strain sauces/custards/etc, sift flour, decorate cakes with powdered sugar.
cast iron skillet - I use if for pan frying, cooking high-fat meat (helps keep the seasoning), and pancakes. Nothing in your kitchen will heat as evenly. It's a champ.
grater

Time to Trick it out
digital probe thermometer - get one that has a digital readout where you plug in the thermometer which is attached to a cord (like
this
). That way, when you're cooking something in the oven, you don't have to open the door to see how close it is to being done. Plus, it has an alarm that will go off when the thermometer reads a
certain temperature.
toaster or toaster oven - I like the toasters with big openings so you're less limited with what you can put in there.
crock pot - Put food in there and leave it all day. Low maintenance cooking at its best.
9"x13" cake pan and/or 2 9" round cake pans and/or springform pan - if you're into astetics when you bake or like cheesecake
stand mixer - I'll just say this. There's a reason KitchenAid is the gold standard. I hear Cuisinart also makes a good one. Look for one with a planetary motion (it orbits while it's spinning). There should
be one beater, not two. They generally come with a whisk, a paddle, and a dough hook. I got my KitchenAid for $100 off Amazon (they have them on sale every once and a while. Be patient and wait for the
sale.)
roasting pan - If you plan to ever make Thanksgiving dinner, you will need one. Get one with a rack. I like the flat ones best.
blender or immersion blender - If you're into smoothies, buy a regular blender. Otherwise, I'd go with the immersion one. Immersion blenders are especially good for making milkshakes and pureeing soups.
food processor - I use mine mostly for making pastry dough and bread crumbs and grating veggies. If you're going to buy a food processor, get the grating and slicing blades. You'll thank me later.
ice cream maker - I have the Cuisinart version where you put the core in the freezer overnight and it sits on a rotating base. It hasn't failed me yet.
coffee grinder - I really want one of those coffee makers that grinds the coffee for you. Anyway, this is nice for having nice, fresh coffee in the morning or for grinding whole spices.
salad spinner - It's good to get the moisture off the surface of greens before storing them. It helps them stay good longer.
pizza stone - The best homemade pizza comes off a pizza stone.
Bookmark and Share

Recipe: Pasta Salad

Dressing:
1/4 c extra-virgin olive oil
2 T balsamic vinegar
1 clove garlic, minced

Salad:
3/4 lb cooked pasta (I used bowtie. Fusili or penne would also be good.)
2 oz pepperoni, cut into bite-sized pieces
2 oz provolone, cubed
1 cucumber, peeled, quartered and sliced
A few grape tomatoes, kalamata olives, and pepperoncini, cut into bite-sized pieces
1 sun-dried tomato, cut into bite-sized pieces

Method:
1. Whisk together vinegar, oil, and garlic until it has a uniform consistency. You don't need to bother drizzling the oil into the vinegar.
2. Toss dressing with the rest of the ingredients.

Most of the time taken by this recipe is taken by cutting stuff up, which can be done while the pasta cooks. If you cook the pasta while you're prepping the rest of the ingredients, rinse the pasta in cold water before adding it to the rest of the ingredients so it's easier to work with.